Before and after photos on dental crowns or porcelain bridges over dental implants performed in our dental implants office.
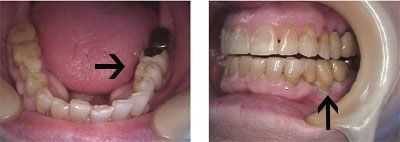
A porcelain dental crown is cemented on a single tooth dental implant. Notice the staining and imperfection that was created in the porcelain to make the tooth appear real. Contrast this aesthetic result with the two unattractive posterior dental crowns.
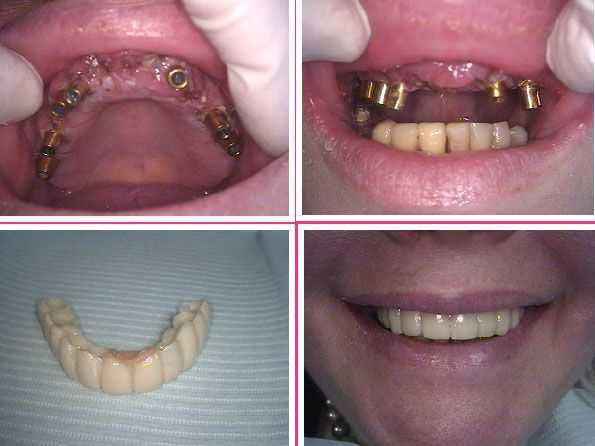
Maxillary upper jaw dental implants and a provisional temporary teeth bridge. Notice these teeth implants need preparation with copious water irrigation to create parallelism for the final porcelain metal dental crown bridge.
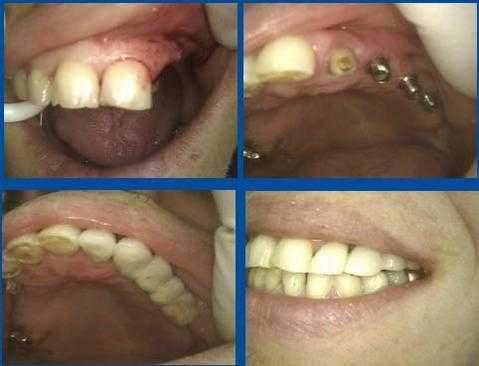
Dental Implants with dental crown and bridge in the upper left jaw. The lateral tooth crown is separate from the posterior dental implant teeth bridge.
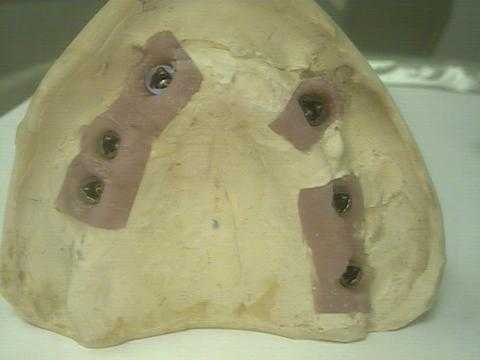
Master model containing six Replace Select dental implant lab analogs in the maxilla upper jaw. How to pictures for replacing missing teeth using a dental crown bridge over dental implants. Photo #1 of 4
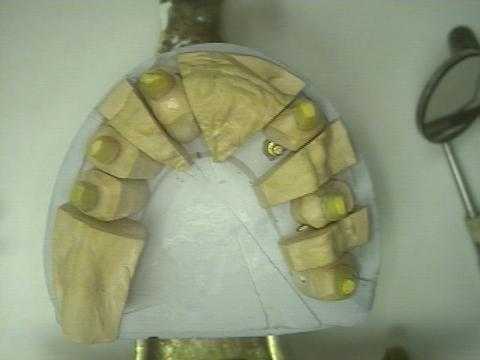
Master model containing six Replace Select dental implant gold alloy plastic direct tooth abutments in the upper jaw. How to pictures for replacing missing teeth using a dental crown bridge over dental implants. Photo #2 of 4
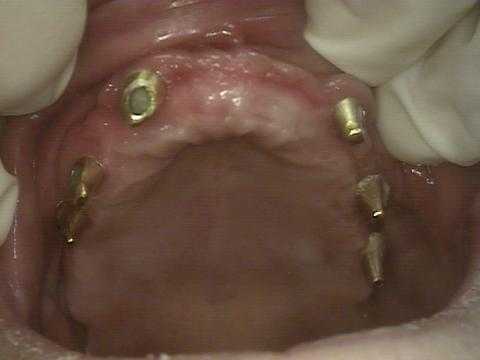
Upper jaw containing six Replace Select dental implant direct cast gold abutments. How to pictures for replacing missing teeth using a dental crown bridge over dental implants. Photo #3 of 4
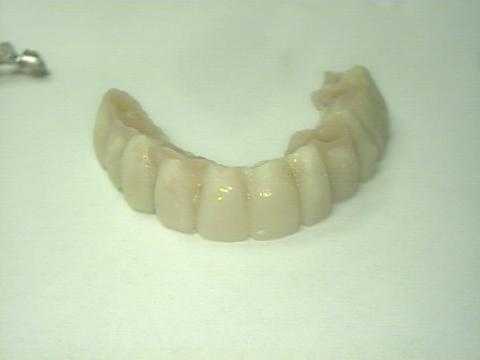
Upper jaw fixed temporary acrylic teeth bridge that will be seated over the dental implants abutments. This is retained using a soft reline material instead of temporary dental cement to minimize trauma during its removal when trying in the final bridge during fabrication. How to pictures for replacing missing teeth using a dental crown bridge over dental implants. Photo #4 of 4
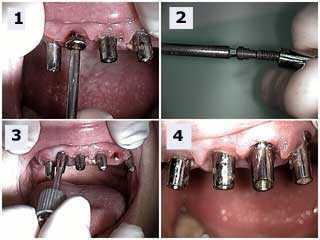
Second stage dental implant abutment connections. The six dental implants in this maxillary jaw have already healed and are just below the gum. How to Pictures – Teeth abutment connection. Photo 1) A dental implant healing cap is being removed with a screwdriver. Photo 2) A screwdriver is pushing a screw through the second stage dental implant abutment. Photo 3) The second stage abutment is being connected to the first stage dental implant. Photo 4) The second stage abutment is now connected to the dental tooth implant. Photo #1 of 4.
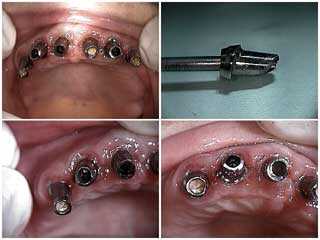
Second stage dental implant abutment connections. The six dental implants in this jaw have already healed and are just below the gum. How to Pictures – Abutment parallelism. 1) Note the lack of parallelism in the dental implant abutments. 2) A screwdriver is used to hold a second stage abutment. Notice the angle of the abutment prepared extra orally to begin creating parallelism. 3) and 4) You can see how the preparation in 2) is beginning to create parallelism but there is still more work to do. It is better to do the majority of this preparation extra orally – if possible – because of heat generation. You will need to keep track of the orientation of each second stage abutment when they are individually removed and replaced. Minor preparation may be accomplished intra orally with light pressure and lots of water irrigation. Photo #2 of 4.
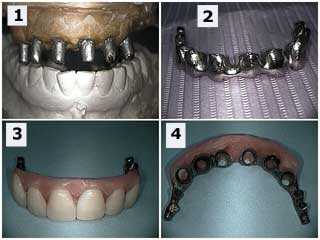
Second stage dental implant abutment connections. The six dental implants in this maxillary jaw have already healed and are just below the gum. How to Pictures – Dental Lab work). 1) The working model. 2) A very light but strong titanium frame for the dental bridge. 3) & 4) The wax-up of the anterior six teeth on the titanium frame. Note in 4) that occlusal openings in the titanium will allow easy access to the second stage screws if necessary. Photo #3 of 4.
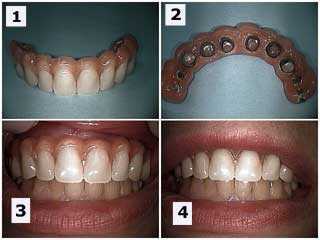
Second stage dental implant abutment connections. The six dental implants in this jaw have already healed and are just below the gum. How to Pictures – The final prosthesis, tooth crown dental bridge. The final prosthesis is acrylic fused to titanium. Note in 2) that occlusal openings in the titanium will allow easy access to the second stage screws if necessary. 3) The inserted dental bridge prosthesis with the upper lip pulled back. 4) The inserted dental crown bridge prosthesis with a normal lip position. Photo #4 of 4.
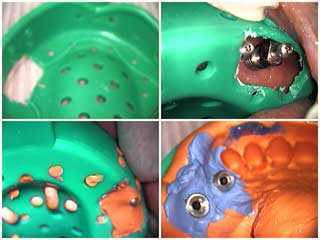
Taking an impression of two upper left dental implants for porcelain a porcelain dental bridge. How to Pictures. 1) The impression tray with a cut-out for the dental implant impression copings. 2) The impression tray being tested for fit over the two dental implants intra orally. 3) The actual dental impression. Note the implant impression screws just peaking through the impression material. 4) The impression copings in the impression. Photo #1 of 5
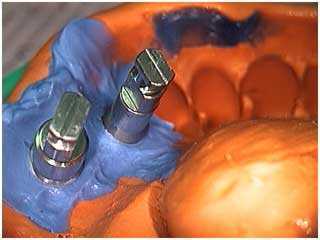
An impression of two maxillary upper left dental implants for porcelain dental crown bridge. Note the the dental implant impression copings placed in the dental impression material. How to Pictures. Photo #2 of 5
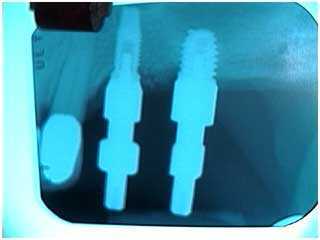
Radiograph x-ray of the dental implant impression copings connection before taking a dental impression. How to xray. Photo #3 of 5
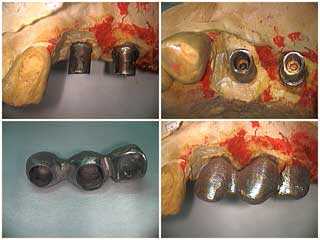
Metal dental bridge frame try-in of a three teeth porcelain dental crown bridge over two maxillary upper left dental implants. How to pictures. Photo #4 of 5
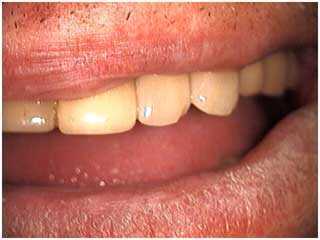
Maxillary upper left posterior three teeth porcelain metal dental crown bridge try-in over two dental implants. How to pictures #5 of 5
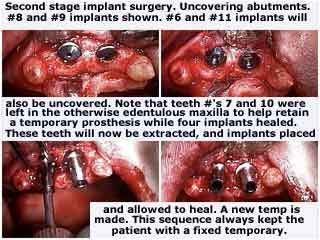
Second stage dental implant oral surgery. Uncovering dental implant abutments. How to pictures. The text in the image says: Second stage implant surgery. Uncovering abutments. #8 and #9 implants shown. #6 and #11 implants will also be uncovered. Note that the teeth #’s 7 and 10 were left in the otherwise edentulous maxilla to help retain a temporary prosthesis while four implants healed. These teeth will now be extracted, and implants placed and allowed to heal. A new temp is made. This sequence always kept the patient with a fixed temporary.
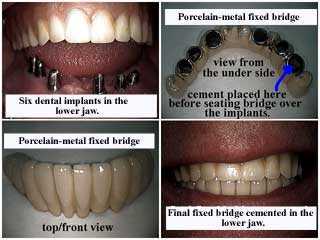
Six dental implants were placed in the mandible lower jaw. The porcelain metal fixed dental crown bridge was then cemented to each dental tooth implant using dental cement.
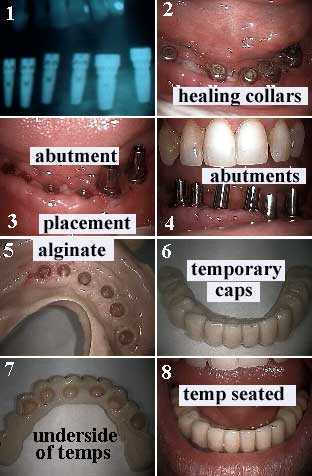
Six dental implants in an edentulous mandible – no teeth in the lower jaw. How to pictures. Fabrication of a temporary provisional dental crown bridge over dental teeth implants.
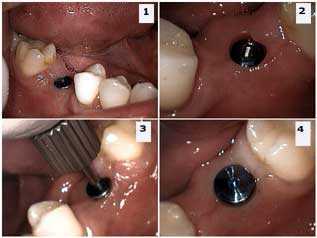
Dental implant cover screw removal and placement of a dental implant healing abutment. How to pictures. 1) Dental implant in the lower first molar position with the cover screw in place. 2) Cover screw removed showing the female threading inside the first stage dental implant. 3) The healing abutment being screwed in place. 4) The healing abutment in place.
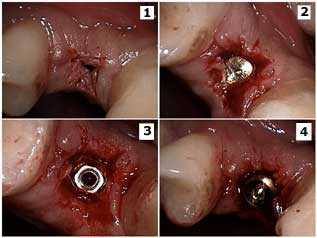
Surgical isolation of a first stage dental implant in the upper premolar area and placement of a dental implant healing collar. How to Pictures. 1) Initial incision. 2) Identification of the dental implant cover screw. 3) Cover screw removal reveals the internal female threading of the first stage tooth implant. 4) Placement of the dental implant healing collar.
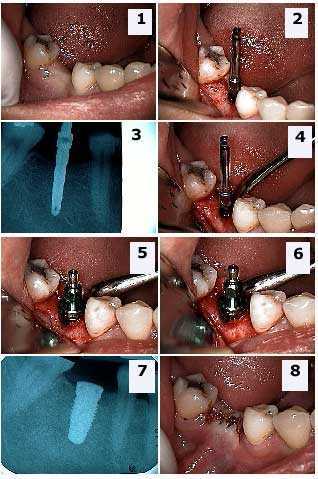
Dental implant oral surgery for the first stage tooth implant in the lower first molar position. The abutment teeth have minimal restorations. How to Pictures. 1) The pre-operative site. The clinical exam revealed sufficient width and depth of bone for the placement of the dental implant. 2) An osteotomy was made with a Sterioss bur with internal irrigation. 3) Radiograph taken to assure enough room between the apex of the implant and the inferior alveolar nerve. 4) Sterioss bur in position. 5) – 6) Implant placed with carrier still attached. 7) Radiograph of implant confirming correct placement. 8) Primary closure of surgical site.
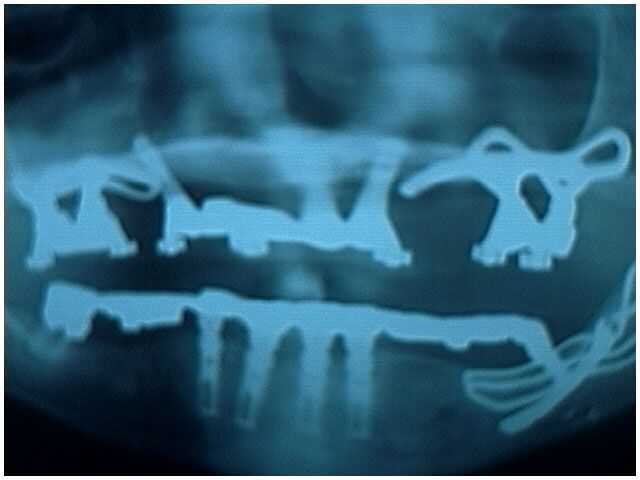
Combination of dental implants teeth. Three unilateral subperiosteal dental implants (two upper and one lower) that vary in age from 5-16 years, seven anterior dental implants (three upper and four lower) that vary in age from 3-11 years, and one lower posterior molar with a telescopic coping that has remained intact for 16 years.